Wednesday, December 24, 2014

Brussel Sprouts with Bacon

This is a GREAT way to eat Brussels sprouts! We had this at Thanksgiving and I'm making them again tonight for our Christmas Eve feast. It's simple and delicious. Enjoy!

Brussels Sprouts with Bacon

3 slices bacon, chopped
1 T. olive oil
1 shallot, chopped
1.5 lbs. Brussels sprouts, trimmed and halved
Salt and pepper, to your taste
1 c. chicken broth

Brown bacon in a medium skillet over medium high heat. Remove bacon to a paper lined plate. Add olive oil to the pan with the bacon grease and add the shallots and saute 1-2 minutes. Add the Brussels sprouts and coat in oil. Cook 2-3 minutes until they begin to soften. Add the chicken broth and bring to a bubble, then cover and reduce the heat to medium low. Cook about 10 minutes, until tender. Transfer to a serving dish with a slotted spoon and top with cooked bacon bits.

Source: Rachael Ray

Monday, December 15, 2014

Mini Raspberry Cheesecakes

I made these at my parents' house several years ago and they were such a festive (and delicious) Christmas treat! It's kind of a tragedy I haven't made them since, but I'm hoping to remedy that this year. These are so cute and are actually pretty easy to make. My swirls weren't the most beautiful, but I'm sure you can do much better! These would make a great treat to bring to any holiday party or to bring to some friends this season.

Mini Raspberry Cheesecakes

For the crust:

1.5 cups graham cracker crumbs
4 T. unsalted butter, melted
3 T. sugar

For the raspberry swirl:

6 oz. fresh raspberries (you can use thawed frozen ones)
2 T. sugar

For the filling:

2 lbs. cream cheese, at room temperature
1.5 c. white sugar
Pinch of salt
1 tsp. vanilla extract
4 large eggs, at room temperature

Preheat the oven to 325 degrees. Line cupcake pans with paper liners. In a small bowl, combine the crust ingredients. Stir together with a fork until well blended and the crumbs are moistened. Press 1 T. of the mixture into the bottom of each cupcake liner. (Use a small glass or measuring cup or something to press down). Bake until just set, about 5 minutes. Transfer to a cooling rack.

To make the raspberry puree, combine the raspberries and sugar in a blender or food processor. Process until smooth, then pour through a fine mesh sieve to remove the seeds. Set aside.

To make the cheesecake, beat the cream cheese on medium-high speed in the bowl of an electric mixer until fluffy. Blend in the sugar until smooth. Mix in the salt and vanilla. Beat in the eggs one at a time, mixing well after each addition.

To assemble, spoon 3 T. of the cheesecake batter over the crust in each cupcake liner. dot a 1/2 tsp. of the raspberry puree in a few dots over the cheesecake filling. Use a toothpick or a wooden skewer to lightly swirl and create a marbled effect.

Bake until the filling is set, about 22 minutes, rotating the pans halfway through baking. They will look quite puffed initially but will return to normal quickly. Transfer to a wire cooling rack and let cool to room temperature. Chill in the refrigerator for at least 4 hours before serving.

Source: Annie's Eats

Friday, December 12, 2014

Dark Chocolate Orange Lacey Cookies

I have been dreaming about these cookies ever since I made this last year at Christmas time. To me they just taste like Christmas. Almonds, orange zest, dark chocolate - they are perfect! You can make these several different ways, but I prefer them with chocolate sandwiched between them. (Who wouldn't?) Apparently they are a Trader Joe's knock-off. I've never had the Trader Joe's version but these are delicious! They are extremely thin, with crisp edges and slightly chewy middles. They are extremely addicting, so beware! I can't wait to make them again this weekend!

Dark Chocolate Orange Lacey Cookies
There is a waiting period after you mix these up before you bake them, so plan accordingly!

1/2 c. brown sugar
2 T. butter
1 T. vanilla
2 T. milk
1/4 c. honey
1/3 c. all-purpose flour
1/2 c. almonds, coarsely ground
1/2 tsp. cinnamon
1 heaping tsp. orange zest
1/2 c. dark chocolate (for dipping - or any chocolate you like)

Preheat your oven to 350 degrees. Line two baking sheets with parchment paper or silicone mats. In a medium saucepan, combine the butter, sugar, milk, vanilla, and honey and cook over medium to medium high heat until you reach a boil, stirring continuously. Once in reaches a rolling boil, let it boil for one minute and then remove from the heat and set aside.

In a mixing bowl, combine the flour, almonds, cinnamon and orange zest. Add this mixture slowly to the wet mixture until fully incorporated. Let the mixture rest for 20 minutes until cool enough to handle. If it is too stiff to work with when you return, reheat it slightly over low heat.

Drop teaspoon-sized balls onto your baking sheets, leaving about 3 inches of space between each because they will spread a lot. Let them cook for 6-8 minutes. If you want them crunchier like toffee leave them in longer. Remove when the centers are bubbling and they are a golden brown color. Let cool on the tray for 3-5 minutes before removing them.

Melt your chocolate in the microwave or in a double-boiler. Add a teaspoon or so of chocolate in between two cookies and sandwich them together. You can also wrap them into a tube shape while they're stills lightly warm and dip them in chocolate or just leave them plain. If your chocolate isn't hardening, you can put them in the fridge for about 15 minutes. Enjoy!

Source: My Jerusalem Kitchen

Monday, August 25, 2014

Falafel

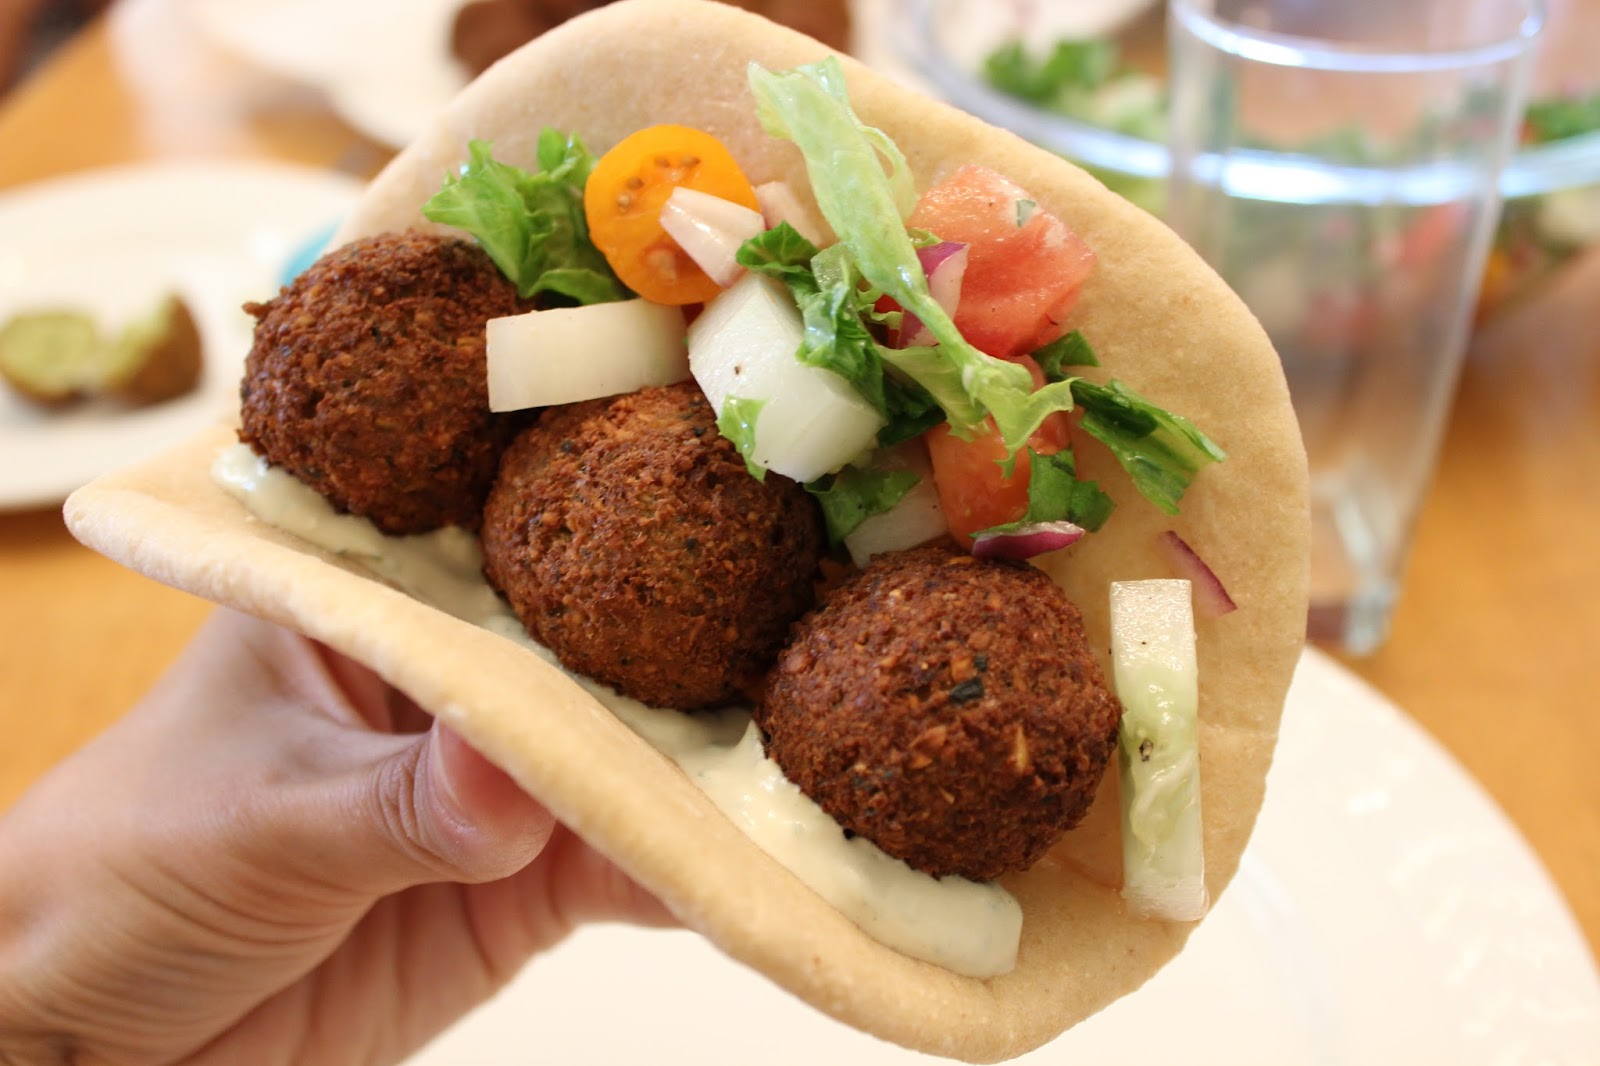
It's falafel time! Are you familiar with falafel? They are made from ground chickpeas along with spices and then formed into balls and deep-fried in oil. What's not to love? Hehe. They are a popular street food in the Middle East (and all over now) and are commonly eaten in a pita topped with pickled vegetables or salad and tahini sauce. I first tried falafel a few years ago when we lived in Pittsburgh and I loved it! Since then I've been wanting to try making them at home, but never got around to it until my super awesome sister Heidi came to visit last month. We made them together and they were SOOO good! There is a lot of wait time and you have to plan in advance if you want to make them, but the actual time spent working is quite minimal. Looking at this picture makes my mouth water! I better make them again soon!
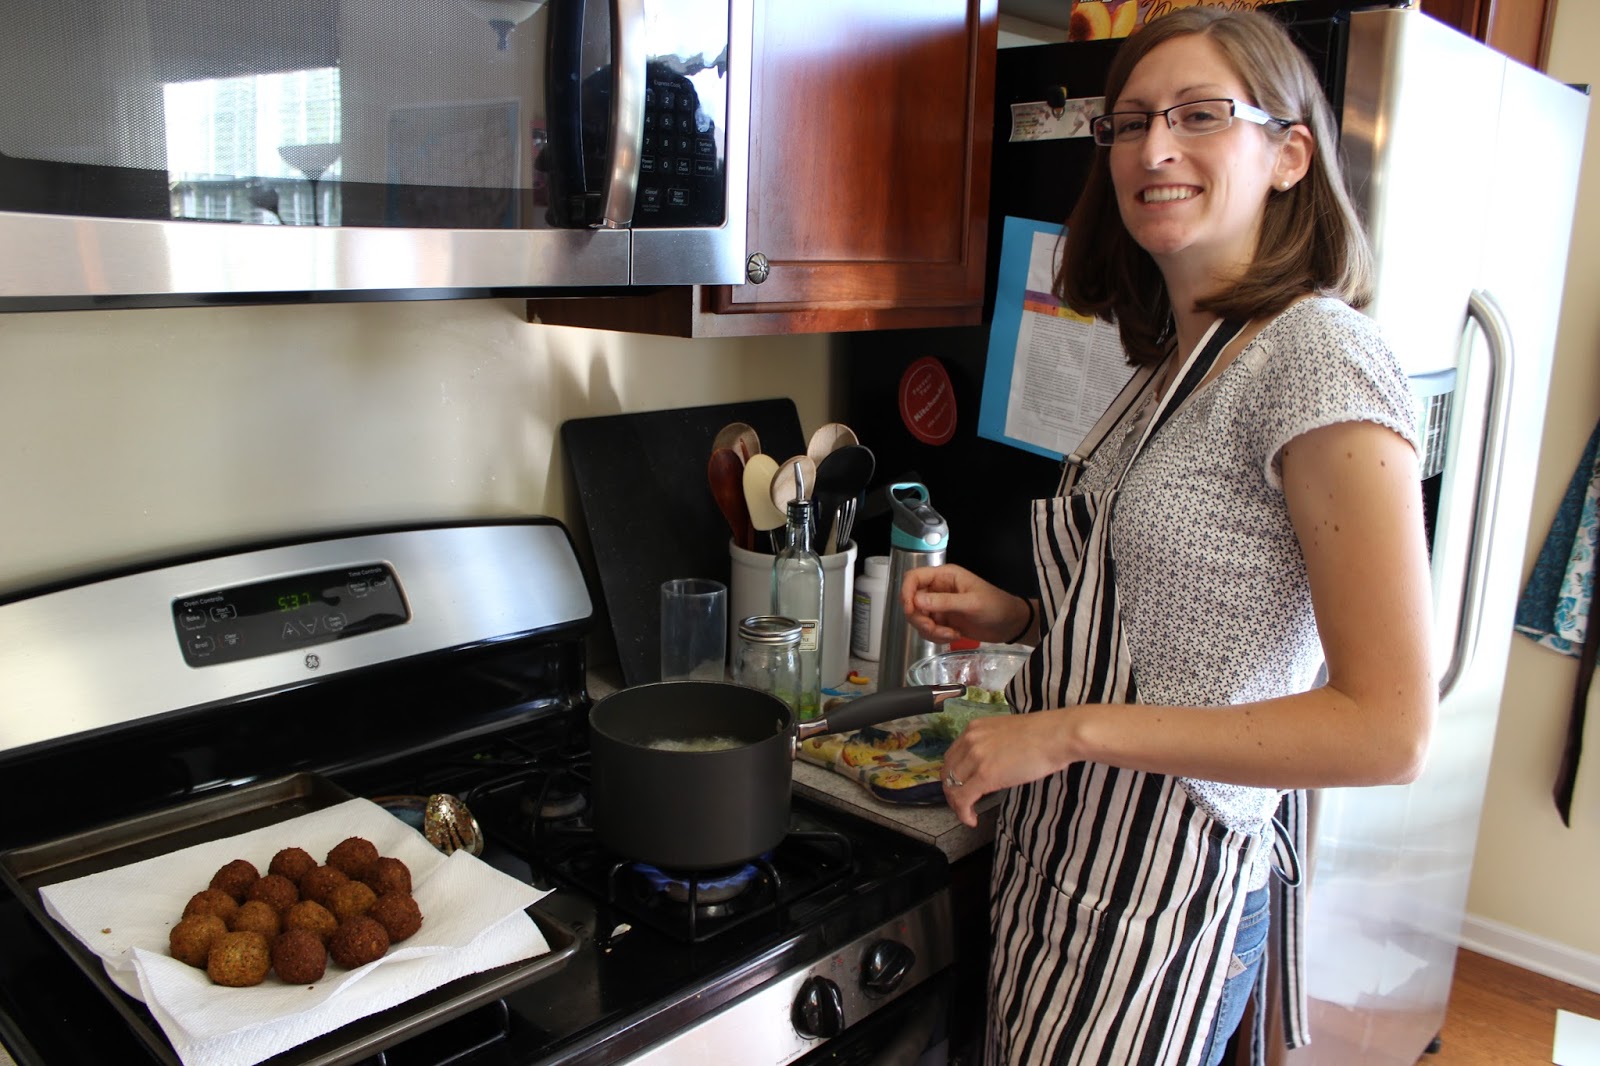
My cute sister Heidi! Falafel-frying extraordinaire!
Falafel

You'll need to start soaking your chickpeas the day before you want to make this and then the mixture has to sit in the refrigerator for 1-2 hours after you combine everything, so plan ahead! You also need a food processor or powerful blender to make these. Makes about 30 falafels.

1 lb. (about 2 cups) dry chickpeas/garbanzo beans
1 small onion, quartered
1/4 cup. fresh parsley
3-5 cloves garlic
1.5 T. flour
1 3/4 tsp. salt
2 tsp. cumin
1 tsp. ground coriander
1/4 tsp. black pepper
1/4 tsp. cayenne pepper
pinch of ground cardamom
Vegetable oil for frying (grapeseed, canola, or peanut)

The night before you plan to serve these, pour the chickpeas into a large bowl and cover them by about 3 inches of water. Let them soak overnight. They will double in size. They will still be quite hard, but don't despair, they'll chop up just fine.

1-2 hours before you cook the falafel, drain and rinse the garbanzo beans well. Pour them into the food processor along with the onion, garlic, parsley, flour, salt, cumin, coriander, black pepper, cayenne pepper, and cardamom (everything but the oil).

Pulse all ingredients together until a rough, coarse meal forms. You may have to scrape down the sides several times. Process until the mixture is somewhere between the texture of couscous and a paste. You want the mixture to hold together when you clump it with your fingers, but you don't want it so processed that it turns into hummus/mush.

Once the mixture has reached the desired consistency, pour it out into a bowl and use a fork to stir. Remove any large chickpea chunks the processor may have missed. Cover the bowl with plastic wrap and let sit in the refrigerator for 1-2 hours.

Remove from the refrigerator and fill a skillet or saucepan with oil to a depth of at least 1.5 inches. Heat the oil slowly over medium heat. Meanwhile, form the falafel mixture into round balls using wet hands or a cookie scoop, about 2 T. per ball. They should stick together quite well. If not, you may need to process them more until they become more paste-like.

Test your oil by dropping a tiny amount of the mix in the oil. If it sizzles and bubbles, you are ready to go! You can also fry a whole ball first to check your temperature. It should take about 2-3 minutes per side to get nice and deep golden brown. If it's faster than that, your oil is too hot and the middle will not be cooked all the way, but you also don't want them to take longer than that or they will get dried out.

Fry about 5 or more at a time, depending on how much space you have. Remove with a slotted spoon onto a paper towel-lined plate.

Serve the falafels fresh and hot. They are best alongside hummus or creamy tahini or stuffed into a pita.

Source: Tori Avey

Multi-Grain Pancake Mix

I've lost count of how many pancake recipes I have on this blog, but whatever. I guess I like pancakes. Funny thing is, I never actually liked pancakes as a kid, so maybe it is my eternal goal to find every delicious pancake recipe out there to prove that pancakes are actually delicious. And they are! (When they're made from scratch anyway...)

So on to the recipe. The mix comes from King Arthur Flour, but I found this jazzed up version on Annie's Eats. The mix is awesome - totally healthy with hardly any sugar and lots of whole grains, but it tastes a little boring without the improvements. All she did was add lemon zest and vanilla and it completely elevates the flavors! I also love to add blueberries because, come on, who doesn't love blueberry pancakes (Besides my three year-old, ahem). The blueberries are not necessary, but if you like blueberries, you'll love them in here. Enjoy!

Multi-Grain Pancake Mix
This original recipe is from King Arthur Flour, and doesn't include the lemon zest or vanilla. It's a good recipe without those, but it's amazing with them! I found this version at Annie's Eats and it makes it so much better. I love them with the addition of blueberries too - fresh or frozen.

Makes about 10 cups mix. Each batch (using 1 cup mix) makes about 8 pancakes - multiply as needed.

For the mix:
3 1/2 c. old-fashioned rolled oats
5 c. white whole wheat flour (or combo of red & white if you prefer)
3 T. sugar
3 T. baking powder
1 T. salt
1 T. baking soda
3/4 c. vegetable oil

To make the pancakes:
1 c. pancake  mix
3/4 c. buttermilk
1 large egg, lightly beaten
1 tsp. vanilla extract
1/2 tsp. lemon zest
blueberries, fresh or frozen, optional

To make the pancakes, add the oats to the bowl of a food processor until finely ground (but not a powder). Transfer the oats to the bowl of an electric mixer and add in the flour, sugar, baking powder, salt and baking soda. Mix on low speed to combine (or you can do this by hand if needed). Drizzle the vegetable oil into the bowl slowly while the mixer is running and continue to mix until evenly combined and the mixture clumps slightly when squeezed together.

Transfer the mix to an airtight container. It will keep for a week at room temperature or for a long long time in the freezer.

To make the pancakes, mix together 1 c. pancake mix (this can easily be doubled, tripled, etc.) with the buttermilk, egg, vanilla, and lemon zest. Whisk the batter until mostly smooth. Let the batter stand 5-10 minutes before using, allowing the grains to soak up the liquid (up to 20 minutes is great too, but I find I usually don't have time for that in the morning).

Heat a skillet or griddle over medium heat and lightly grease with spray, oil, or butter. Ladle 1/4 cup batter for each pancake and then dot with blueberries (however many you like). Allow to cook until bubbles begin to form on the top surface. Use a large spatula to flip the pancakes and cook on the other side until light golden and cooked through. Repeat with remaining batter and serve.

Source: Adapted slightly from Annie's Eats, which was adapted from King Arthur Flour

Monday, August 11, 2014

Granola Balls

We found these over at Mel's Kitchen Cafe and we love them! They are the perfect little snack. I've made a few changes - reducing the amount of honey and chocolate chips - to make them taste more like a snack and less like a dessert. You can experiment with different nut butters and add-ins as well to make your own creation. We've tried peanut butter and almond butter, dried fruit instead of chocolate chips, and adding chia seeds into the mix and they've all been delicious! They come together very quickly and stay fresh for quite awhile. Enjoy!

Granola Balls

You can easily experiment with different add-ins - just try to keep the wet:dry ratio about the same. Let me know what you try! :)

*You can use Rice Krispies if that's all you have; I just prefer all natural crisped brown rice cereal because it's usually just one ingredient and whole grain.

2 c. quick oats
1 c. crispy brown rice cereal*
1 c. natural peanut butter
1 c. ground flaxseed
1/2 c. mini chocolate chips
1/2 c. honey
2 T. coconut oil
2 tsp. pure vanilla extract

Combine all ingredients in a large bowl, mixing gently so you don't crush the rice cereal. Mix until well combined. Using a cookie scoop (or spoon/hands), drop rounded balls about the size of a walnut onto a lined cookie sheet. Refrigerate for 1-2 hours, then transfer to an airtight container or ziploc bag to store in the refrigerator or freezer. They'll stay fresh for a week or so in the refrigerator and several months in the freezer.

Source: Adapted from Mel's Kitchen Cafe

Wednesday, July 30, 2014

Confetti Corn

What? I'm blogging? I know, shocker. Turns out, moving across the country every year is kind of time-consuming. Nevertheless, we still have to eat. And we've been eating well! We are now in the Midwest, home to lots and lots of corn. Now, I LOVE corn on the cob, so I'm always hesitant to do anything with fresh corn rather than slather it in butter, salt and pepper, and devour it while getting it all over my face. BUT, if you're ready for something different, or if you're having company and don't want everyone awkwardly picking corn and pepper out of their teeth, than this is a great use of those fresh ears of corn. Also, if you have leftover corn on the cob you don't know what to do with, this is a great way to use it up. Just reduce the cook time after you add the corn to 1-2 minutes, or until heated through. This dish is fresh and flavorful, and it comes together very easily, which is essential for a side dish. I've made it twice in the last few weeks, and I need to make it again soon! Enjoy!

Confetti Corn
Ina Garten suggests chopping the onion and pepper in 1/2 inch pieces, but I prefer them smaller and I'm pretty sure my kids do too. I've put 1/4-inch on here, but be aware that's a change from the original recipe. 

2 T. olive oil
1/2 c. small-diced red onion
1 small orange bell pepper, 1/4-inch diced
2 T. butter
kernels cut from 5 ears un-cooked yellow or white corn (about 4 cups)
1 1/2 tsp. kosher salt
1 tsp. freshly ground black pepper
2 T. julienned fresh basil, minced fresh chives and/or minced fresh parsley

Heat the olive oil over medium heat in a large saute pan. Add the onion and saute for 5 minutes, until the onion is soft. Stir in the bell pepper and saute for 2 more minutes.

Add the butter to the pan and allow it to melt. Add the corn, salt, and pepper, and continue to cook, stirring occasionally, for 5-7 minutes, until the corn just loses its starchiness. Season to taste, gently stir in the fresh herbs, and serve.

Source: Slightly adapted from Barefoot Contessa Back to Basics